Democratic Underground Latest Greatest Lobby Journals Search Options Help Login
Google

Stasera il pane (Tonight's bread)

Printer-friendly format Printer-friendly format
Printer-friendly format Email this thread to a friend
Printer-friendly format Bookmark this thread
This topic is archived.
Home » Discuss » DU Groups » Home & Family » Cooking & Baking Group Donate to DU
 
Stinky The Clown Donating Member (1000+ posts) Send PM | Profile | Ignore Tue Apr-05-05 08:27 PM
Original message
Stasera il pane (Tonight's bread)
Just plain old Italian bread. 24 hour biga, 5 minute knead by machine, 4 hour rise.


Water wash before baking. Baked in the oven with two baking stones and a cast iron pan with some water in it.


S'coolin' now, so we'll see .......
Printer Friendly | Permalink |  | Top
eleny Donating Member (1000+ posts) Send PM | Profile | Ignore Tue Apr-05-05 09:19 PM
Response to Original message
1. What got water washed, the stones or the oven?
And also - is the cast iron pan in view in the pic? Looks like a shiny metal, so I figured to ask.

The bread looks fabulous! I just got a bread knife at the thrfit. A German company that has their knives made in China. It looks like it could cut your bread per-fect-ly - so send it over! :woohoo:
Printer Friendly | Permalink |  | Top
 
Stinky The Clown Donating Member (1000+ posts) Send PM | Profile | Ignore Tue Apr-05-05 11:34 PM
Response to Reply #1
3. The picture is an old one ... from a pizza thread
But tonight's setup was the exact same .... except .... I put a small (6"? 7"?) cast iron skillet on the very bottom rack and allowed it to heat with the oven and the stones. No water in it ... yet.

Let the whole shebang heat up for at least an hour. An hour and a half is better. Two hours is better yet. I let it go about an hour and a half tonight. When the bread is proofed and ready to rip, I put a water wash on the bread. I then put the bread in the oven. That was what the peel was for. When all is set, at the very last minute, I pour water into the skillet (be VERY VERY VERY careful). The water instantly turns to steam. I mean I N S T A N T L Y. If you're not careful you'll get one hell of a scald. Anyway, add about 6 oz of water to the skillet and close the oven immediately. Do Not Peek. For at least the first 10 minutes.

Steam is what causes a crust to get that wonderful flakiness/crunchiness. This method is fair. Ideally, you'd have a steam injector oven or a brick oven. As I said, this works fairly well, but not perfectly. In a home oven, you'll never get to perfect, so this, while only fair, is about as good as it gets.

The metal you see in the picture is the pan attached to one of the pizza stones. These stones aren't store-bought. They're made from leftovers from the casting of a large commercial hearth oven from these guys:

http://www.woodstone-corp.com/gallery.htm

Each stone is about an inch and a quarter thick and weighs about 20 pounds. It is extraordinarily dense ceramic made specifically to retain heat. By using one as the baking surface and one above it, you replicate reasonably well the conditions inside a real brick/hearth oven. It is even better as a setup for pizzas, since the upper stone cooks the top as fast as the lower stone cooks the crust.

Knives .... my bread knife is a cheap-o that looks like an expensive one. I've had it for years, and for bread, it is perfect. It looks just like this, but was made in China.

A bread knife is a perfect one to consider a cheapie for. So long as it has a serrated edge and is used only for bread, your great grandchildren will still be using it!
Printer Friendly | Permalink |  | Top
 
eleny Donating Member (1000+ posts) Send PM | Profile | Ignore Wed Apr-06-05 12:11 AM
Response to Reply #3
5. Thanks for the good details on the bread baking
Edited on Wed Apr-06-05 12:12 AM by eleny
What do you have the water in when you pour it into the skillet. I'm imagining myself working with the baster to give me some more arm length. But basters don't hold a lot of water.

Btw, my bread knife is a Slitzer. Great name for a cuttlery company! It looks just like yours in the pic but no red dot on the handle.
Printer Friendly | Permalink |  | Top
 
Stinky The Clown Donating Member (1000+ posts) Send PM | Profile | Ignore Wed Apr-06-05 12:34 AM
Response to Reply #5
6. "I'm imagining myself working with the baster"
You're getting the idea! I use a ladle ... and a silicone oven mitt that covers to somewhere above my wrist. Like one of these:


I love the knife name ... Slitzer!

Years ago, I worked with a guy (we design commercial kitchens) whose last name was .... tada .... Kitchen.

Then there's the world famous dentist ..... Dr. Payne.

:)
Printer Friendly | Permalink |  | Top
 
Lugnut Donating Member (1000+ posts) Send PM | Profile | Ignore Tue Apr-05-05 11:10 PM
Response to Original message
2. Oh that's pretty
My mouth is watering. I also want to know what was water washed. :D
Printer Friendly | Permalink |  | Top
 
Stinky The Clown Donating Member (1000+ posts) Send PM | Profile | Ignore Tue Apr-05-05 11:35 PM
Response to Reply #2
4. We wash our water every Tuesday morning
along with our shortz ... :P
Printer Friendly | Permalink |  | Top
 
Stinky The Clown Donating Member (1000+ posts) Send PM | Profile | Ignore Wed Apr-06-05 09:13 AM
Response to Reply #2
8. I reread your question. I misread it the first time
You asked a question and I gave a smartass reply about washing our water.

I waterwashed the bread just before putting it in the oven. A pastry brush dipped in plain water and "painted" on the bread ..... a "water wash" .... like an egg wash, but with water.
Printer Friendly | Permalink |  | Top
 
Lugnut Donating Member (1000+ posts) Send PM | Profile | Ignore Wed Apr-06-05 11:13 PM
Response to Reply #8
11. Got it
I was confused but you were more confused than I was. :D I've been learning a lot of neat tips from you and I love the pictures that accompany your instructions. ;)
Printer Friendly | Permalink |  | Top
 
housewolf Donating Member (1000+ posts) Send PM | Profile | Ignore Wed Apr-06-05 01:28 AM
Response to Original message
7. That's a gorgeous loaf of bread!
Edited on Wed Apr-06-05 01:28 AM by housewolf
Yummmm... It looks SOOOO good!

Do you find that it really makes a difference having the top baking stone? I've never tried that, just used bricks or tiles in the bottom. How'd you go about getting them from Woodstone, did you have to go there in person to get them? Do you find that they work better than bricks or tiles?


Printer Friendly | Permalink |  | Top
 
Stinky The Clown Donating Member (1000+ posts) Send PM | Profile | Ignore Wed Apr-06-05 10:03 AM
Response to Reply #7
9. The pizza stones ........
I got them from Woodstone a few years ago. As part of my business I specify their ovens when appropriate. I don't sell them or anything, but I do specify them. (I'm to a kitchen as an architect is to a building ... a designer.)

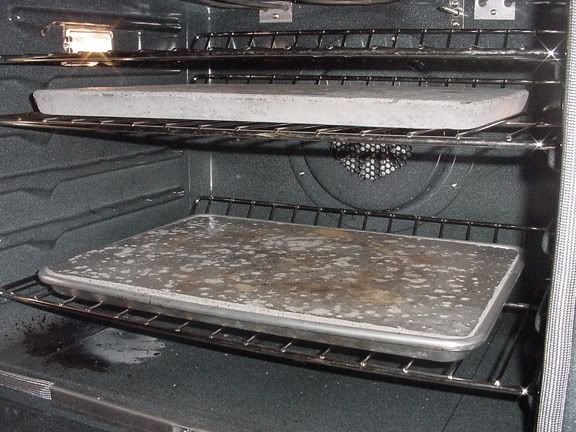
Woodstone makes their hearths (4" to 6" thick, depending on the oven size) by pouring a ceramic slurry into a mold. This must be done in a single pour, so they always make a little more slurry than they actually need to fill the mold. They pour the remaining slurry into half size commercial sheet pans and were in the habit of giving them away to various people .... like us designers .... their sales people .... customers, etc. etc. (In fact, if you look closely at the picture, above, you can see that one of my stones is still in the sheet pan ..... it stuck and couldn't be "unmolded".) Anyway, that's how I got mine.

I understand now that they're selling them as pizza stones. That said, there's no mention of them on their web site. I also understand that the ones the size of mine are supposed to have an MSRP of $125.

The stone itself is made, as I said, from their proprietary hearth material. It is very dense and formulated specifically to gather and retain heat. In my experience, they do what they're supposed to do. In home use, mine has never failed to make a great pizza. After pizza, after pizza. They don't lose as much heat, as a percentage, to the product as do other stones. In other words, they have much more thermal mass, and thermal mass, in a hearth oven, is where its at. That ... and radiant heat.

I have experience with the typical pizza stone sold at stores in the $20 range. These are made from a far more porous and lightweight material. They tend to draw moisture from the dough. That's not a bad thing, but it is a different principle than the imparting of heat, which these stones do. These stones are not at all porous. Rather than draw off moisture by wicking it into the stone and vaporizing it from there, these "boil" it off on the surface. A small difference, but different, to be sure. The bigger difference is in the thermal mass. The lighter stones just don't have the same thermal mass.

Does the use of two stones make a difference? I think it does. The lower one replicates a true hearth. The upper one replicates the (nearly as essential) oven dome. In a true hearth (black or white) oven both the hearth and the dome play vital roles in the cooking and baking process.

These are sold to do essentially the same thing:


Here's a web site that has them. Click on the picture to get a better understanding of what they are and how they work. I have no experience with these gizmos, and have never seen one except of the web, but they look pretty interesting.

http://asp1.walkontheweb.com/hearthkitchen/store.asp

I would also suggest you go to Woodstone's site and read their dissertation on oven history. It puts some of this "science" into a more practical perspective. You might also google "hearth oven" or similar terms. There's lots of info out there on how a black or white oven works. (Black oven - fire built within the oven itself. White oven - fire built in a separate chamber below or beside the cooking chamber) These ovens date to man's earliest days and the science of them has changed very little over the thousands and thousands of years we've used them. Just the materials and construction techniques. But the basic science of them ..... virtually identical.

For what its worth, I'm in the early planning stages of building a brick dome oven in my back yard. Will it ever get built .... :shrug: But the whole idea really fascinates me. There's another person who has occasionally posted here who has built one. Here's a thread that talks about ovens. Look down the thread for the post and pictures from the poster Willy Lee.

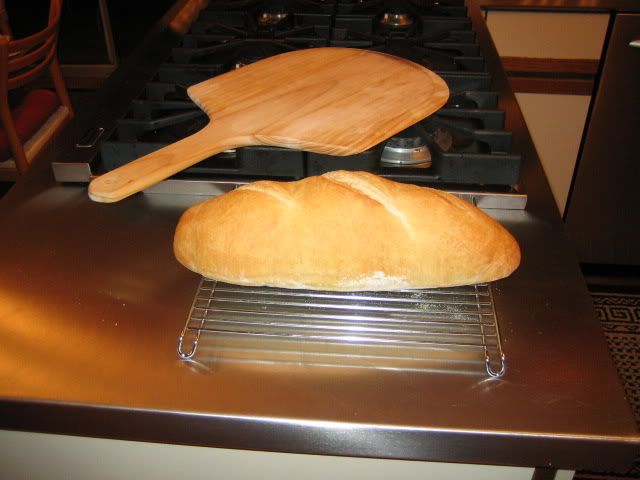
http://www.democraticunderground.com/discuss/duboard.php?az=show_topic&forum=236&topic_id=3501

Il pane - il personale di vita (Bread - the staff of life)
Printer Friendly | Permalink |  | Top
 
murphymom Donating Member (443 posts) Send PM | Profile | Ignore Wed Apr-06-05 06:20 PM
Response to Reply #9
10. I'm an old Sunset reader from way back
and I remembered an article on building an adobe oven - I checked their web site and it seems they've brought back the instructions for it:

http://www.sunset.com/sunset/garden/article/0,20633,690891,00.html

Thought you might be interested, in case you haven't seen it.
Printer Friendly | Permalink |  | Top
 
eleny Donating Member (1000+ posts) Send PM | Profile | Ignore Thu Apr-07-05 12:44 AM
Response to Reply #10
12. Thanks - I've printed it out!!!!
I sure appreciate your posting this. I was so surprised to see that the "recipe" called for clay soil added to the concrete. We have very heavy clay garden soil here. If I ever convince hubby to help me with this and we get it done, I'll post pics. I've already picked out a spot for it.

I don't know a thing about baking in these ovens. I wonder how you make the fire in there. The cavity doesn't look big. But I'm so happy to have these instructions - and good ones they are!
Printer Friendly | Permalink |  | Top
 
Stinky The Clown Donating Member (1000+ posts) Send PM | Profile | Ignore Thu Apr-07-05 10:45 AM
Response to Reply #12
13. I've seen those plans in Sunset books
The funny thing is, in the instructions, nowhere do they say that the cardboard barrel used to form the vault is, in fact, temporary. It will ultimately be burned away when you fire the oven!

Clay/adobe ovens are an ancient design. Because they make use of locally available materials, they were often built to be used for only a short time by the early nomadic tribes (probably worldwide). This particular design is ultra simple ... no chimney, no parging, no cover ... and a rear vent, which is kinda unusual.

eleny, go to that woodstone link I included above and click your way to the history of ovens they have on the site. Very interesting.

How to build the fire ....... uh .... matches? :) Actually, you build the fire right inside the oven, on the hearth ... the very same hearth upon which you'll be cooking food. Note that the first few fires need to be gentle to cure the oven. A really hot early fire may cause the oven to crack. Not a catastrophe, but it means you'll have to patch it.

Once cured, however, you start with a light and airy fire using maybe a balled up sheet of newspaper and some kindling. Get it flaming. Add more and more kindling. You want the fire hot. In Europe, they use what is called fagot wood .... bundles of sticks and trimmings, none of which is much thicker than a finger or thumb. You don't use fireplace wood. It takes to long to catch and burns more slowly.

Most people build the fire towards the door of the oven and then, as it gets to really roaring, "move" it toward the center, and also spread it out somewhat. Since you're only burning small pieces of wood, this is pretty easy to do.

After the fire gets going, you'll see that the entire interior of the oven seems to be a ball of flame. At this point the gasses in the wood have caught fire. That's a good thing. Its your goal. The interior of the oven dome will be black with soot. Soon, however, after the gasses start to burn, you'll see the oven dome turn white. The soot is now burned off and the oven's at or near temperature (about 750 to 900 degrees!). Since the oven works by releasing slowly the heat it stores during the firing, you want all that heat.

Now you can do one of two things with the fire. Keep it going (but at a reduced burn speed), which works well for, say pizzas, or anything that wants the ultra high heat. Sweep the fire to one side of the oven and bake on the other side.

Or you can let the fire burn out and then sweep it out of the oven and bake. In this case, you're baking entirely on the retained heat of the oven. You'll probably, even is this little oven, have two hours of cooking time before it cools.

(A side note .... as the oven is cooling, which could take as long as overnight, you can put in tomorrow's firewood to make sure it is nice and dry - dry, dry, dry wood is best for this type of oven. Just let the oven get down to a low temp ... lower than is useful for cooking, and put the wood in there for an overnight stay. It'll be nice and dry for the next day's firing.)

This oven is in the "black oven" category, which is to say the fire is built right in the oven. In a "white oven" the fire is built in a separate chamber next to or below the oven, and in general, the fire is kept burning to maintain temperature. Black ovens cook on the "declining heat" White ovens are more complicated to construct.

Anyway, there are many links on the web. Google "hearth oven" or "bread oven" or "pizza oven" or "brick oven" ot "wood oven", etc., etc. There's a lot of info out there.
Printer Friendly | Permalink |  | Top
 
DU AdBot (1000+ posts) Click to send private message to this author Click to view 
this author's profile Click to add 
this author to your buddy list Click to add 
this author to your Ignore list Thu May 02nd 2024, 02:52 PM
Response to Original message
Advertisements [?]
 Top

Home » Discuss » DU Groups » Home & Family » Cooking & Baking Group Donate to DU

Powered by DCForum+ Version 1.1 Copyright 1997-2002 DCScripts.com
Software has been extensively modified by the DU administrators


Important Notices: By participating on this discussion board, visitors agree to abide by the rules outlined on our Rules page. Messages posted on the Democratic Underground Discussion Forums are the opinions of the individuals who post them, and do not necessarily represent the opinions of Democratic Underground, LLC.

Home  |  Discussion Forums  |  Journals |  Store  |  Donate

About DU  |  Contact Us  |  Privacy Policy

Got a message for Democratic Underground? Click here to send us a message.

© 2001 - 2011 Democratic Underground, LLC